kelvinluck.com

a stroke of luck

Second steps with Flash 10 audio programming


A while back I did some experimenting with the new Flash 10 audio features. Since then I’ve received a couple of emails from people who have noticed that the flash player can freeze up when the mp3 file is initially extracted with the Sound.extract command – especially with longer mp3 files.

The solution is to simply extract only as much of the sound as you need to work with on each sampleData callback. However, this can get confusing when you combine it with the speed changing code from my first example. So I’ve put together another example which uses this method:

The code is available for download here or you can see it below:

package com.kelvinluck.audio
{
   import flash.events.Event;
   import flash.events.SampleDataEvent;
   import flash.media.Sound;
   import flash.media.SoundChannel;
   import flash.net.URLRequest;
   import flash.utils.ByteArray;    

   /**
    * @author Kelvin Luck
    */

   public class MP3Player
   {
     
      public static const BYTES_PER_CALLBACK:int = 4096; // Should be >= 2048 && < = 8192

      private var _playbackSpeed:Number = 1;

      public function set playbackSpeed(value:Number):void
      {
         if (value < 0) {
            throw new Error('Playback speed must be positive!');
         }
         _playbackSpeed = value;
      }

      private var _mp3:Sound;
      private var _dynamicSound:Sound;
      private var _channel:SoundChannel;

      private var _phase:Number;
      private var _numSamples:int;

      public function MP3Player()
      {
      }

      public function loadAndPlay(request:URLRequest):void
      {
         _mp3 = new Sound();
         _mp3.addEventListener(Event.COMPLETE, mp3Complete);
         _mp3.load(request);
      }

      public function playLoadedSound(s:Sound):void
      {
         _mp3 = s;
         play();
      }
     
      public function stop():void
      {
         if (_dynamicSound) {
            _dynamicSound.removeEventListener(SampleDataEvent.SAMPLE_DATA, onSampleData);
            _channel.removeEventListener(Event.SOUND_COMPLETE, onSoundFinished);
            _dynamicSound = null;
            _channel = null;
         }
      }

      private function mp3Complete(event:Event):void
      {
         play();
      }

      private function play():void
      {
         stop();
         _dynamicSound = new Sound();
         _dynamicSound.addEventListener(SampleDataEvent.SAMPLE_DATA, onSampleData);
         
         _numSamples = int(_mp3.length * 44.1);
         
         _phase = 0;
         _channel = _dynamicSound.play();
         _channel.addEventListener(Event.SOUND_COMPLETE, onSoundFinished);
      }
     
      private function onSoundFinished(event:Event):void
      {
         _channel.removeEventListener(Event.SOUND_COMPLETE, onSoundFinished);
         _channel = _dynamicSound.play();
         _channel.addEventListener(Event.SOUND_COMPLETE, onSoundFinished);
      }

      private function onSampleData( event:SampleDataEvent ):void
      {
         var l:Number;
         var r:Number;
         var p:int;
         
         
         var loadedSamples:ByteArray = new ByteArray();
         var startPosition:int = int(_phase);
         _mp3.extract(loadedSamples, BYTES_PER_CALLBACK * _playbackSpeed, startPosition);
         loadedSamples.position = 0;
         
         while (loadedSamples.bytesAvailable > 0) {
           
            p = int(_phase - startPosition) * 8;
           
            if (p < loadedSamples.length - 8 && event.data.length <= BYTES_PER_CALLBACK * 8) {
               
               loadedSamples.position = p;
               
               l = loadedSamples.readFloat();
               r = loadedSamples.readFloat();
           
               event.data.writeFloat(l);
               event.data.writeFloat(r);
               
            } else {
               loadedSamples.position = loadedSamples.length;
            }
           
            _phase += _playbackSpeed;
           
            // loop
            if (_phase >= _numSamples) {
               _phase -= _numSamples;
               break;
            }
         }
      }
   }
}

You can compare it to the code in the original post to see the changes I made.

One thing to note is that there is still a delay when you load an MP3 in my example. This is because I am using the same FileReference.browse > Sound object hack as last time and this needs to loop over the entire loaded mp3 file while turning it into a Sound object. This wouldn’t be an issue in most use-cases where you have loaded the sound through Sound.load.

I also removed the option of playing the sound backwards in this example as that would have added further complexity to the code and hurt my head even more!

First steps with flash 10 audio programming


As I was reading my RSS feeds yesterday I came across a blog post by Andre Michelle where he released some sourcecode for using the new Sound APIs in Flash Player 10. I had a little spare time so I decided to finally set up FDT to allow me to author flash 10 swfs (which was easier than I expected) so I could do some playing.

The idea was to re-create my wave sequencer experiment using the APIs but to get started I did something simpler. I wrote a little class which allows you to load an MP3 file and play it back with the ability to change the playback speed dynamically. Here it is:

You can see the sourcecode for the relevant file below. The interesting stuff from an audio point of view is happening in the onSampleData callback. This is triggered by the Flash player whenever it needs a new buffer of audio samples to play. The code in that function is commented and hopefully pretty self explanatory. It is derived from code in my old wave sequencer experiment which was itself derived from some code in the popforge library.

package com.kelvinluck.audio
{
   import flash.events.Event;
   import flash.events.SampleDataEvent;
   import flash.media.Sound;
   import flash.net.URLRequest;
   import flash.utils.ByteArray;

   /**
    * @author Kelvin Luck
    */

   public class MP3Player
   {

      private var _playbackSpeed:Number = 1;

      public function set playbackSpeed(value:Number):void
      {
         _playbackSpeed = value;
      }

      private var _mp3:Sound;
      private var _loadedMP3Samples:ByteArray;
      private var _dynamicSound:Sound;

      private var _phase:Number;
      private var _numSamples:int;

      public function MP3Player()
      {
      }

      public function loadAndPlay(request:URLRequest):void
      {
         _mp3 = new Sound();
         _mp3.addEventListener(Event.COMPLETE, mp3Complete);
         _mp3.load(request);
      }

      public function playLoadedSound(s:Sound):void
      {
         var bytes:ByteArray = new ByteArray();
         s.extract(bytes, int(s.length * 44.1));
         play(bytes);
      }
     
      public function stop():void
      {
         if (_dynamicSound) {
            _dynamicSound.removeEventListener(SampleDataEvent.SAMPLE_DATA, onSampleData);
            _dynamicSound = null;
         }
      }

      private function mp3Complete(event:Event):void
      {
         playLoadedSound(_mp3);
      }

      private function play(bytes:ByteArray):void
      {
         stop();
         _dynamicSound = new Sound();
         _dynamicSound.addEventListener(SampleDataEvent.SAMPLE_DATA, onSampleData);
         
         _loadedMP3Samples = bytes;
         _numSamples = bytes.length / 8;
         
         _phase = 0;
         _dynamicSound.play();
      }

      private function onSampleData( event:SampleDataEvent ):void
      {
         
         var l:Number;
         var r:Number;
         
         var outputLength:int = 0;
         while (outputLength < 2048) {
            // until we have filled up enough output buffer
           
            // move to the correct location in our loaded samples ByteArray
            _loadedMP3Samples.position = int(_phase) * 8; // 4 bytes per float and two channels so the actual position in the ByteArray is a factor of 8 bigger than the phase
           
            // read out the left and right channels at this position
            l = _loadedMP3Samples.readFloat();
            r = _loadedMP3Samples.readFloat();
           
            // write the samples to our output buffer
            event.data.writeFloat(l);
            event.data.writeFloat(r);
           
            outputLength++;
           
            // advance the phase by the speed...
            _phase += _playbackSpeed;
           
            // and deal with looping (including looping back past the beginning when playing in reverse)
            if (_phase < 0) {
               _phase += _numSamples;
            } else if (_phase >= _numSamples) {
               _phase -= _numSamples;
            }
         }
      }
   }
}

As you can see, there are three public methods in the above class. loadAndPlay will load an mp3 file into a sound object and start playing it at the desired playbackSpeed. stop will stop the currently playing mp3. And playLoadedSound will start playing an already loaded sound object at the desired playbackSpeed. This is useful if you have already preloaded your sound objects but it is also useful for another important reason as you can see in the demo.

Thanks to some great work from an old friend of mine, it is possible to dynamically create a Sound object based on an MP3 loaded through the new FileReference.load() functionality in Flash 10. This is why in the demo you can browse for an mp3 file on your local machine which can then be dynamically controlled by Flash immediately without sending it to a server first.

You can download the complete FDT project of my demo here if you want to look through all of the code. I’m excited by the possibilities that are opening up in flash now that Adobe made some noise – I’ve got a long way to go before I can do anything nearly as incredible as the Hobnox audio tool but I’ve got some ideas and I’m looking forward to playing around with them :)

Update: Check out my follow on post where I examine how to extract the audio on demand rather than up front.


Experiment with Papervision 3D particles and effects


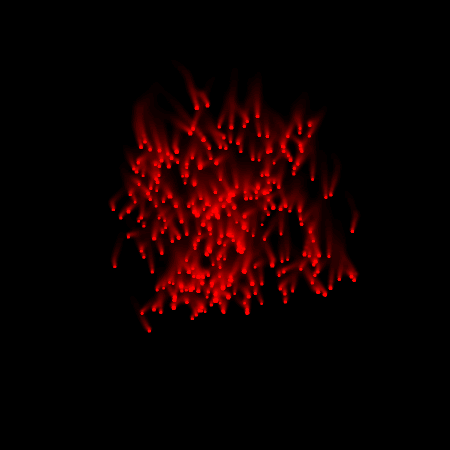
A while back I was prototyping something for a client which involved lots of red dots moving around in 3D space, realised using Papervision 3D. I didn’t end up persuing this route with the client in the end but the effect was pretty cool so I thought I might as well share it here.

The idea is that there is a bunch of particles who are bouncing around randomly stuck within an invisible cube. The effect looked OK by itself but then I decided to try adding effects. I used a BlurFilter and a BitmapColorEffect to give the each of the particles trails. Then I changed the clipping point like in the original borg cube effects demo to give the impression of the particles falling. I like this version the best – if you move your mouse from side to side around the bottom of the demo swf then it starts to look like some kind of flocking is going on (like in my perlin noise experiment).

Click on the image below to see the demo. Click inside the demo swf to give it focus and then you can use the following keys:
  • 1 – Sets the render mode to normal clean particles (the default).
  • 2 – Sets the render mode to particles with trails.
  • 3 – Sets the render mode to falling particles with trails.
  • c – Toggles display of a cube showing the area the particles are contained within.

Particles and effects in Papervision 3D

The sourcecode for this example is pretty simple. You can see it below or you can download it from here.

package  
{
   import org.papervision3d.core.effects.BitmapColorEffect;
   import org.papervision3d.core.effects.BitmapLayerEffect;
   import org.papervision3d.core.geom.Particles;
   import org.papervision3d.materials.WireframeMaterial;
   import org.papervision3d.materials.utils.MaterialsList;
   import org.papervision3d.objects.DisplayObject3D;
   import org.papervision3d.objects.primitives.Cube;
   import org.papervision3d.view.AbstractView;
   import org.papervision3d.view.BasicView;
   import org.papervision3d.view.layer.BitmapEffectLayer;
   
   import flash.display.StageQuality;
   import flash.events.Event;
   import flash.events.KeyboardEvent;
   import flash.filters.BlurFilter;
   import flash.geom.Point;      

   /**
    * @author Kelvin Luck
    */

   [SWF(width='450', height='450', backgroundColor='#000000', frameRate='41')]

   public class ParticlesCube extends BasicView
   {
     
      public static const NUM_PARTICLES:int = 300;
      public static const CONTAINING_CUBE_SIZE:int = 500;
     
      public static const RENDER_MODE_CLEAN:int = 0;
      public static const RENDER_MODE_TRAILS:int = 1;
      public static const RENDER_MODE_FALLING:int = 2;
     
      private var particlesContainer:DisplayObject3D;
      private var particlesHolder:Particles;
      private var particles:Array;
      private var boundsCube:Cube;

      private var bfx:BitmapEffectLayer;
     
      private var _renderMode:int;
      public function set renderMode(value:int):void
      {
         if (value == _renderMode) return;
         
         clearBitmapEffects();
         
         var clippingPoint:Point = new Point();
         
         switch (value) {
            case RENDER_MODE_CLEAN:
               // nothing - effects already cleared above...
               break;
            case RENDER_MODE_FALLING:
               clippingPoint.y = -2;
               // fall through...
            case RENDER_MODE_TRAILS:
               bfx = new BitmapEffectLayer(viewport, stage.stageWidth, stage.stageHeight, true, 0xffffff);
               
               bfx.addEffect(new BitmapLayerEffect(new BlurFilter(2, 2, 2)));
               bfx.addEffect(new BitmapColorEffect(1, 1, 1, .9));
               
               bfx.clippingPoint = clippingPoint;
               
               bfx.addDisplayObject3D(particlesHolder);
               
               viewport.containerSprite.addLayer(bfx);
               break;
            default:
               throw new Error(value + ' is an invalid render mode');
         }
         _renderMode = value;
      }
     
      private var _displayCube:Boolean = true;
      public function set displayCube(value:Boolean):void
      {
         if (value != _displayCube) {
            _displayCube = value;
            boundsCube.visible = value;
         }
      }

      public function ParticlesCube()
      {
         super(550, 550);
         
         stage.quality = StageQuality.MEDIUM;
         
         particlesContainer = new DisplayObject3D();
         scene.addChild(particlesContainer);
         
         var cubeMaterial:WireframeMaterial = new WireframeMaterial(0x0000ff, 1, 2);
         var materialsList:MaterialsList = new MaterialsList();
         materialsList.addMaterial(cubeMaterial, 'all');
         
         boundsCube = new Cube(materialsList, CONTAINING_CUBE_SIZE, CONTAINING_CUBE_SIZE, CONTAINING_CUBE_SIZE);
         particlesContainer.addChild(boundsCube);
         displayCube = false;
         
         particlesHolder = new Particles();
         particlesContainer.addChild(particlesHolder);
         
         init(NUM_PARTICLES, CONTAINING_CUBE_SIZE);
         
         stage.addEventListener(KeyboardEvent.KEY_DOWN, onKeyDown);
         
         startRendering();
      }

      public function init(numParticles:int, containingCubeSize:int):void
      {
         var movingParticle:MovingParticle;
         
         if (particles) {
            particlesHolder.removeAllParticles();
         }
         
         particles = [];
         
         var i:int = numParticles;
         while (i--) {
            movingParticle = new MovingParticle(containingCubeSize);
            particlesHolder.addParticle(movingParticle);
            particles.push(movingParticle);
         }
         
      }

      override protected function onRenderTick(event:Event = null):void
      {
         // move each particle
         var movingParticle:MovingParticle;
         for each (movingParticle in particles) {
            movingParticle.position();
         }
         
         // twist the container based on mouse position
         particlesContainer.rotationY+=((stage.stageWidth/2)-mouseX)/200;
         particlesContainer.rotationX+=((stage.stageHeight/2)-mouseY)/200;
         
         // render
         super.onRenderTick(event);
      }
     
      private function clearBitmapEffects():void
      {
         if (bfx) {
            viewport.containerSprite.removeLayer(bfx);
            bfx = null;
         }
      }
     
      private function onKeyDown(event:KeyboardEvent):void
      {
         switch (String.fromCharCode(event.keyCode)) {
            case '1':
               renderMode = RENDER_MODE_CLEAN;
               break;
            case '2':
               renderMode = RENDER_MODE_TRAILS;
               break;
            case '3':
               renderMode = RENDER_MODE_FALLING;
               break;
            case 'c':
            case 'C':
               displayCube = !_displayCube;
               break;
         }
      }
   }
}

import org.papervision3d.core.geom.renderables.Particle;
import org.papervision3d.materials.special.ParticleMaterial;

internal class MovingParticle extends Particle
{
   
   public static const PARTICLE_SIZE:int = 10;
   public static const MAX_SPEED:int = 5;
   
   private var dX:Number;
   private var dY:Number;
   private var dZ:Number;
   private var halfSize:Number;

   public function MovingParticle(containingCubeSize:int)
   {
      var mat:ParticleMaterial = new ParticleMaterial(0xff0000, 1, ParticleMaterial.SHAPE_CIRCLE);
      super(mat, PARTICLE_SIZE);
     
      var size:int = containingCubeSize;
      halfSize = size / 2;
     
      x = (Math.random() * size) - halfSize;
      y = (Math.random() * size) - halfSize;
      z = (Math.random() * size) - halfSize;
     
      dX = Math.random() * MAX_SPEED;
      dY = Math.random() * MAX_SPEED;
      dZ = Math.random() * MAX_SPEED;
     
   }
   
   public function position():void
   {
      x += dX;
      if (x > halfSize || x < -halfSize) dX *= -1;
      y += dY;
      if (y > halfSize || y < -halfSize) dY *= -1;
      z += dZ;
      if (z > halfSize || z < -halfSize) dZ *= -1;
   }
}
// This line is just to stop the code formatter on my blog getting confused! >


jScrollPane 1.2 released


I’ve just released a new version of jScrollPane – my jQuery plugin for cross-browser customisable scrollbars. It’s been a long time since the plugin has been updated and this release contains a number of significant improvements:
  • a jScrollPane now correctly scrolls when you tab to a focusable element within it [example]
  • a jScrollPane can now automatically re-initialise itself when images inside it load [example]
  • external (and internal) links to an anchor within a jScrollPane now correctly scroll the jScrollPane [example]
  • defaults settings are now user-settable [example]
In addition to these changes, jScrollPane now has a new home on googlecode. This makes it easier for people to keep up to date with the latest version and more importantly it makes it easier for me to track bug reports and issues with jScrollPane (something that was basically impossible on the jQuery plugins site). As you can see, there is already a number of issues raised (one of which has high priority) so there may well be a bug fix release soon. In the meantime, it would be good to get people testing the new release and seeing if I broke anything else while implementing these changes…

Update:

jScrollPane 1.2.1 was released very shortly after 1.2 to fix a fairly serious bug which prevented links within the scroll pane from working correctly. As always, the googlecode site has the latest version.


Flash on the Beach and some Perlin Noise


Last week I went to the Flash on the Beach conference and as has been said by many people, it was amazing.

I decided to go for more of the inspirational rather than technical sessions and saw some absolutely amazing speakers including (in order of appearance): Hoss Gifford, Joshua Davis, Brendan Dawes, Craig Swann, Mario Klingemann, Robert Hodgin, Erik Natzke, Chris Allen, Dr Woohoo, Andre Michelle, Marcos Weskamp and Jared Tarbell. Wow!

And as well as all these amazing talks there was the opportunity to meet loads of friends – old and new – and to chat about geeky stuff. And then there was all of the booze and the parties… And a girl in a box!

Anyway, one particular example from Robert got me thinking and wanting to play… He mentioned the PerlinNoise function and talked about how it could be used to simulate flocking. And he showed a slide where a perlin noise image had been used to set the rotation of a set of arrows displayed on top of it. I wanted to play with this and had a little bit of time over the weekend so I managed to come up with this:

My perlin creatures

It’s really simple stuff – you can get the sourcecode and see the process that it evolved through here. The code isn’t beautiful or optimised as I was trying to concentrate on playing rather than doing it right (a concept which seemed to be a recurring theme of the conference).

And I wasn’t the only one who got interested by Robert’s mention of perlin noise. Seb Lee-Delisle posted on Sunday about 3D Perlin Noise in Flash – it looks like a really interesting way to take this further. I can’t wait to see what he comes up with and hopefully to find some more time to play with it myself :)


Switch stylesheets with jQuery


Update: I’ve released an updated version of this code which is more flexible. Please check it out.

I’ve just discovered jQuery which is an awesome JavaScript library. From the horse’s mouth:
jQuery is a Javascript library that takes this motto to heart: Writing Javascript code should be fun. jQuery acheives this goal by taking common, repetitive, tasks, stripping out all the unnecessary markup, and leaving them short, smart and understandable.
As an example of how succinct and easy code written with jQuery can be I put together a little example that allows you to add a stylesheet switcher to your site. Check out the example in action.

The stylesheet switcher allows your visitors to choose which stylesheet they would like to view your site with. It uses cookies so that when they return to the site or visit a different page they still get their chosen stylesheet.

The JavaScript code that powers the example looks like this:

/**
* Styleswitch stylesheet switcher built on jQuery
* Under an Attribution, Share Alike License
* By Kelvin Luck ( http://www.kelvinluck.com/ )
**/


(function($)
{
   $(document).ready(function() {
      $('.styleswitch').click(function()
      {
         switchStylestyle(this.getAttribute("rel"));
         return false;
      });
      var c = readCookie('style');
      if (c) switchStylestyle(c);
   });

   function switchStylestyle(styleName)
   {
      $('link[@rel*=style][title]').each(function(i)
      {
         this.disabled = true;
         if (this.getAttribute('title') == styleName) this.disabled = false;
      });
      createCookie('style', styleName, 365);
   }
})(jQuery);

Then all you need to do is to add a class of “styleswitch” to any links that you want to activate the stylesheet switcher and a “rel” attribute which corresponds to the “title” attribute of the link tag embedding the stylesheet you want to switch to. Just view the source of the example and all should become clear…

I’d appreciate any feedback on the effectiveness of this technique. I think it should work fine on any browser that jQuery supports (I’ve tested on IE5.5, IE6 and FF1.5 on XP and Safari on OSX). It should degrade gracefully by going to the href of the link when jQuery isn’t supported or JavaScript is disabled. I have linked to a page which suggests possible ways to deal with this situation (disable JavaScript and try and switch stylesheets on the example to see the page).

If you would like to use this code then please feel free to download the zip


FlashrSimpleSearch


Update 3:

This is a very old page imported from my previous blog. If there is missing content below or anything that doesn’t make sense then please check the page on my old blog.

Update 2:

For the latest up to date information about Flashr please check out the new Flashr microsite

Update:

This example will no longer work as-is – you will need to update your Flashr files as described here.

Somebody on the Flashr mailing list was having difficulties getting to grips with Flashr. Since a picture is worth a thousand words and I needed to do some examples of using Flashr 0.5 anyway, I put this very simple example together…

Basically all it does is connects to the Flickr API and does a search for a tag using flickr.photos.search. It then calls flickr.photos.getInfo on each of the returned photos to get more detailed information (like authors name, description and tags used). Once it has got all this information it simply traces it to the output window in Flash.

All of this is made much easier by a feature in the as yet not officially released Flashr 0.5. Now when you make multiple requests to the Flickr API the requests are added to a queue and each one executes in turn. This makes writing applications that rely on multiple API requests (such as this one) much simpler.

DOWNLOAD
You can download all the files for this example from here. This includes the latest version of Flashr 0.5 (see the trac timeline for recent changes). The specific file you are interested in is com.kelvinluck.flashr.example.FlashrSimpleSearch.as.

THE CODE
Here is the entire class which powers this little “application”.

import com.kelvinluck.util.LogWrapper;
import com.kelvinluck.flashr.core.FlashrResponse;
import com.dynamicflash.utils.Delegate;
import com.kelvinluck.flashr.core.ResultsSet;
import com.kelvinluck.flashr.core.Photo;
import com.kelvinluck.flashr.core.Flashr;
/**
* Class: FlashrSimpleSearch
*
* Very simple example showing how to search for a tag using Flashr 0.5 and then
* get more detailed information about each matching photo.
*
* Currently just traces the relvant information out.
*
* Author:
* Kelvin Luck
*/

class com.kelvinluck.flashr.example.FlashrSimpleSearch extends MovieClip
{
   
   public static var SEARCH_TAG:String = "snow";
   public static var NUM_RESULTS:Number = 10;
   
   private var _flashr:Flashr;
   private var _flashrResponse:FlashrResponse;
   
   private var _numResults:Number;
   private var _photos:Array;
   
   /**
   * Function: FlashrSimpleSearch
   * Constructor
   **/

   function FlashrSimpleSearch()
   {
      // uncomment the following lines if you want to see the internals of what is happening with Flashr.
      //LogWrapper.getInstance().init();
      //LogWrapper.getInstance().addTracePublisher();
     
      _photos = [];
     
      _flashr = Flashr.getFlashr();
      _flashr.apiKey = "b40e05adf210ad4c4cc4da00f99f4184";
      _flashr.cacheQueries = true;
     
     
      _flashrResponse = new FlashrResponse();
      _flashrResponse.onPhotosSearch = Delegate.create(this, onPhotosSearch);
      _flashrResponse.onPhotosGetInfo = Delegate.create(this, onPhotosGetInfo);
     
      trace("Searching for " + NUM_RESULTS + " photos matching tag '" + SEARCH_TAG + "'");
      _flashr.photosSearch({tags:SEARCH_TAG, per_page:NUM_RESULTS});
   }
   
   function onPhotosSearch(rs:ResultsSet)
   {
      _numResults = rs.photos.length;
      trace("Loaded data for " + _numResults + " photos out of " + rs.total + " matching tag, requesting more details about each photo");
      for (var i:Number=0; i<_numresults ; i++) {
         var thisPhoto:Photo = rs.photos[i];
         _flashr.photosGetInfo(thisPhoto.id, thisPhoto.secret);
      }
   }
   function onPhotosGetInfo(photo:Photo)
   {
      trace("Loaded detailed data for photo '" + photo.id + "'");
      _photos.push(photo);
      if (_photos.length == _numResults) {
         onAllPhotosLoaded();
      }
   }
   function onAllPhotosLoaded()
   {
      trace("*************ALL PHOTO INFO LOADED*************");
      trace(" ");
      for (var i:Number=0; i<_photos.length; i++) {
         var thisPhoto:Photo = _photos[i];
         trace("Photo " + thisPhoto.id + " :");
         trace("  Title: " + thisPhoto.title);
         trace("  Description: " + thisPhoto.description);
         trace("  Taken: " + thisPhoto.dateTaken);
         trace("  Author: " + thisPhoto.owner.username);
         trace("  Author ID: " + thisPhoto.owner.nsid);
         trace("  Thumbnail: " + thisPhoto.thumbnailUrl);
         trace("  Photo page URL: " + thisPhoto.photoPageUrl);
         trace("  Tags: " + thisPhoto.getTagsAsStrings());
         trace("------------------");
         trace(" ");
      }
   }
   
   /**
   * Function: toString
   **/

   public function toString():String
   {
      return "[com.kelvinluck.flashr.example.FlashrSimpleSearch]";
   }
}

I hope this is useful to someone, please leave any feedback as a comment below or on the Flashr mailing list;


Actionscript 3: part 3!


Update 2:

This is a very old page imported from my previous blog. If there is missing content below or anything that doesn’t make sense then please check the page on my old blog.

Update:

These examples were created with the very first beta of actionscript 3 and run on the very first beta of the flash player 8.5. Unfortunately they don’t work on any release version of the player because of changes Macromedia/ Adobe made.

The evolution of my ActionScript 3 project has continued. Here is the current swf (remember you will need the Flash Player 8.5 to view it):


As you can see, it’s a whole heap more exciting now… It still creates the mosaic tiles from the original jpeg in the same way as the previous examples but now each tile also listens for an EventType.ENTER_FRAME event. This is basically the same as having a MovieClip.onEnterFrame event handler in older versions of Flash. Each tile is repulsed by the mouse using Barslund Repulsion (thanks to a script I grabbed from Solid Ether).

Here is the code for the example in it’s entirety:

Fairly simple really… And if anything it seems way more efficient and responsive than my attempt at bounce tweening in the last example…

Comments or suggestions for improvements appreciated :)


Second steps with ActionScript 3


Update 3:

This is a very old page imported from my previous blog. If there is missing content below or anything that doesn’t make sense then please check the page on my old blog.

Update 2:

These examples were created with the very first beta of actionscript 3 and run on the very first beta of the flash player 8.5. Unfortunately they don’t work on any release version of the player because of changes Macromedia/ Adobe made.

Update:

Check out part 3 of this series on my experiences with ActionScript 3.

I have taken my first attempt at ActionScript 3 and refined it a little… The first attempt was a very simple mosaic tool which created a mosaic from a jpeg. In this version I have improved it in a number of ways:

I now first blur each section of the image to get more of an average colour for each tile. This was a good excuse to use one of the flash.filters.* in AS and also gives a slightly better looking result. It still isn’t perfect but I spent quite a while searching the web and couldn’t find any good algorithms to find the average colour of a given bitmap (I’m sure they exist though – if you know one please leave some info in the comments).

I also decided to make the example a little bit more exciting by adding some movement to it. I initally did this by using the mx.effects classes but then I realised that these were adding 210KB to my file (unless I missed a “SimpleTween” class somewhere?). I presume that is because they depend on the whole Flex Framework but in this case (where my swf does pretty much what I want at 2KB) it seemed like some unnecessary overhead.

So I wrote a very simple little Tween class based on the new flash.util.Timer class and borrowed one of Robert Penner’s easing equations

So here is the resulting swf (note that you will need the flash player 8.5 to view it and that the movement happens when the swf loads so you may have to refresh the page to see it move):

And here is the ActionScript to make that swf:

If you compare it to my previous effort you will see that it is pretty similar… The additions are the BlurFilter and the new Tween class… They should be clear enough… The Tween class is very quickly knocked together and isn’t meant to be a proper generic replacement for the Macromedia ones but I think that such a beast may be necessary if the Macromedia ones are going to create such big files… Hopefully the next version of the zigo tween kit from Moses Supposes will include support for AS3…

Anyway – any comments on the code or suggestions for improvement appreciated :)


First actionscript 3 example


Update 3:

This is a very old page imported from my previous blog. If there is missing content below or anything that doesn’t make sense then please check the page on my old blog.

Update 2:

These examples were created with the very first beta of actionscript 3 and run on the very first beta of the flash player 8.5. Unfortunately they don’t work on any release version of the player because of changes Macromedia/ Adobe made.

Update:

Check out part 2 and part 3 of this series on my experiences with ActionScript 3.

Macromedia have just released the Flex 2 Product Line which includes the Flash Player 8.5 and ActionScript 3. It’s only an alpha but it’s a good chance to start playing around with the next generation of the Flash Platform.

Below is my first little experiment. It’s currently very simple and doesn’t do anything that you couldn’t do with Flash 8 but I think coming up with simple little projects like this and making them is a good way to learn the new syntax.

First up, here is the swf (note that you will need the flash player 8.5 to view it):

And here is the code that generated the swf:

As you can see, we load a jpeg in and then loop over it getting the colour every TILE_SIZE pixels. We then create a new Sprite which we draw a bunch of Shape’s (in this case squares) onto. The result is a mosaic like effect (I remember doing this in the early days of Flash 5 – a much more complicated process involving using PHP to analyse the image data).

Obviously a lot of room for improvement (getting the average pixel colour for a tile, having the image be dynamic rather than programmed into the AS etc etc) but not bad for the first couple of hours with a new language.

Any questions or suggestions for better ways I could have done things please use the comments :)