kelvinluck.com

a stroke of luck

Google maps for flash marker clustering


I’ve recently been working on a project which makes extensive use of the Google maps API for flash (more about that once it launches). One of the things that was necessary for this project was clustering of markers when they were too close together. To understand what I mean by this click the image below to check out the example:

Google Maps for Flash Clustering Screenshot

As you can see, the capital cities of the world are all displayed on the map as small red dots. I got the list of capital cities from here and converted them to XML for the example – note that some of them (e.g. Rome) appear to be slightly incorrectly positioned. If the cities are too close to each other for the current zoom level then they are clustered into larger red dots with numbers in the middle.

This has of course been done before (e.g. here and here) but the solutions didn’t work for my situation. The first is grid based (rather than distance based) which can give some strange results. And more importantly for my project I needed to use custom markers (for both the individual markers and the clusters) and that didn’t seem possible without changing the actual library code. And with the second solution the markers seem to “jiggle” as you drag the map and I wasn’t sure about whether the license permitted use in a commercial project.

So I found a post from Mika Tuupola. In it he explains the advantage of distance based (as opposed to grid based) clustering algorithms. He then provides some PHP sourcecode to implement distance based clustering.

I started off with a fairly straightforward port of the code from the article but I found that it needed to be optimised quite heavily so that it would work performantly in Flash (especially since it needs to re-calculate the clustering on every zoom change). My final Cluster class looked like this:

package com.kelvinluck.gmaps
{
   import com.google.maps.overlays.Marker;

   import flash.geom.Point;
   import flash.utils.Dictionary;

   /**
    * Distance based clustering solution for google maps markers.
    *
    * <p>Algorithm based on Mika Tuupola's "Introduction to Marker
    * Clustering With Google Maps" adapted for use in a dynamic
    * flash map.</p>
    *
    * @author Kelvin Luck
    * @see http://www.appelsiini.net/2008/11/introduction-to-marker-clustering-with-google-maps
    */

   public class Clusterer
   {
     
      public static const DEFAULT_CLUSTER_RADIUS:int = 25;

      private var _clusters:Array;
      public function get clusters():Array
      {
         if (_invalidated) {
            _clusters = calculateClusters();
            _invalidated = false;
         }
         return _clusters;
      }

      private var _markers:Array;
      public function set markers(value:Array):void
      {
         if (value != _markers) {
            _markers = value;
            _positionedMarkers = [];
            for each (var marker:Marker in value) {
               _positionedMarkers.push(new PositionedMarker(marker));
            }
            _invalidated = true;
         }
      }

      private var _zoom:int;
      public function set zoom(value:int):void
      {
         if (value != _zoom) {
            _zoom = value;
            _invalidated = true;
         }
      }

      private var _clusterRadius:int;
      public function set clusterRadius(value:int):void
      {
         if (value != _clusterRadius) {
            _clusterRadius = value;
            _invalidated = true;
         }
      }

      private var _invalidated:Boolean;
      private var _positionedMarkers:Array;

      public function Clusterer(markers:Array, zoom:int, clusterRadius:int = DEFAULT_CLUSTER_RADIUS)
      {
         this.markers = markers;
         _zoom = zoom;
         _clusterRadius = clusterRadius;
         _invalidated = true;
      }

      private function calculateClusters():Array
      {
         var positionedMarkers:Dictionary = new Dictionary();
         var positionedMarker:PositionedMarker;
         for each (positionedMarker in _positionedMarkers) {
            positionedMarkers[positionedMarker.id] = positionedMarker;
         }
         
         // Rather than taking a sqaure root and dividing by a power of 2 to calculate every distance we
         // do the calculation once here (backwards).
         var compareDistance:Number = Math.pow(_clusterRadius * Math.pow(2, 21 - _zoom), 2);
         
         var clusters:Array = [];
         var cluster:Array;
         var p1:Point;
         var p2:Point;
         var x:int;
         var y:int;
         var compareMarker:PositionedMarker;
         for each (positionedMarker in positionedMarkers) {
            if (positionedMarker == null) {
               continue;
            }
            positionedMarkers[positionedMarker.id] = null;
            cluster = [positionedMarker.marker];
            for each (compareMarker in positionedMarkers) {
               if (compareMarker == null) {
                  continue;
               }
               p1 = positionedMarker.point;
               p2 = compareMarker.point;
               x = p1.x - p2.x;
               y = p1.y - p2.y;
               if (x * x + y * y < compareDistance) {
                  cluster.push(compareMarker.marker);
                  positionedMarkers[compareMarker.id] = null;
               }
            }
            clusters.push(cluster);
         }
         return clusters;
      }
   }
}

import com.google.maps.LatLng;
import com.google.maps.overlays.Marker;

import flash.geom.Point;

internal class PositionedMarker
{

   public static const OFFSET:int = 268435456;
   public static const RADIUS:Number = OFFSET / Math.PI;
   
   // public properties are quicker than getters - speed is important here...
   public var position:LatLng;
   public var point:Point;

   private var _marker:Marker;
   public function get marker():Marker
   {
      return _marker;
   }

   private var _id:int;
   public function get id():int
   {
      return _id;
   }

   private static var globalId:int = 0;

   public function PositionedMarker(marker:Marker)
   {
      _marker = marker;
      _id = globalId++;
      position = marker.getLatLng();
     
      var o:int = OFFSET;
      var r:Number = RADIUS;
      var d:Number = Math.PI / 180;
      var x:int = Math.round(o + r * position.lng() * d);
      var lat:Number = position.lat();
      var y:int = Math.round(o - r * Math.log((1 + Math.sin(lat * d)) / (1 - Math.sin(lat * d))) / 2);
      point = new Point(x, y);
   }
}

You can download the class and the code for the example from it’s github repository. Note that the Clusterer class is all that you need to use – the rest of the classes are just for the sake of the example. I hope it’s useful – if you make anything cool with it then please post in the comments.


ColorTransform explorer


I recently worked on a project where the client was providing designs for image manipulations which were being done with a ColorTransform in flash. After a couple of bits of feedback along the lines of “…can the blues have more yellows in them at times…” I decided there must be a better way.

So I built the client a tool which allowed them to fiddle with parameters to ColorTransform and send me the numbers. It’s in the same vein as the Flex style explorer but much simpler. So simple in fact that it is hardly worth posting but I was surprised that I couldn’t find something similar on google so I thought I would save someone else the half hour it took to put together…

Click on the picture below to try it out or you can download the source here.


Flex bug quashing


Last weekend I joined in on the first ever Flex Bug Quash. What is a bug quash?

An event where the community comes together with one goal in mind… To quash as many bugs in one day as humanly possible. Don’t just complain, do something about it.

The idea was to allow the commuity to get involved and contribute bug fixes for the Flex framework back to Adobe. This is open source in action! As someone who has spent a fair amount of time cursing the Flex framework and it’s bugs I thought that I should get involved. It also seemed like a good opportunity to network with other Flex developers – although this aspect would have definitely been better if I was close enough to attend in person in Seattle (or one of the other hubs). At least I was in the correct timezone – some developers in Europe, Asia and Australia worked through the night!

After checking out a working copy of the entire 3.x branch of the Flex SDK from the repository I could work on getting my environment set up. The SDK has Flex Builder library projects for the framework.swc, airframework.swc and rpc.swc set up. So I set up a “BugQuash” project and linked it into the framework library project. This means I was basically monkey patching the framework.swc with the latest sourcecode from svn – including any changes I made. This allowed me to easily tackle bugs.

There was a list of bugs on the Adobe bug tracker which were marked as “SDK Community Bug Fix Candidates” – these were bugs which were considered good candidates for the community to tackle. I think this meant that they hadn’t been judged important enough to be placed on an Adobe engineer’s workload and they weren’t considered too hard or dangerous for the community to have a go at. I had a quick flick through the issues on this list and picked the first one which looked like a nice quick and simple fix.

My first bug took a little longer than I expected to fix. While it was quite simple I wanted to make sure that I was doing things correctly and putting my code in the correct places. It’s harder than simply writing code as you have to make sure you think about how any other developer might use (or abuse) the code you write. Once my code was done I generated a patch file – this was easily done with Tortoise SVN. Having signed the relevant legal documents I could then simply attach the patch to the relevant ticket in the bug tracking system.

Once the patch was on the system it needed to be reviewed by a member of the community. Chris Hill kindly volunterred and checked my code and added some extra test cases. Once this was done the bug went into a queue waiting for official Adobe code review. And once that was done my patch was given the go-ahead and committed back to the framework repository. It was very satisfying when my bug was approved and my patch was checked into SVN. I’m genuinely proud that some of my code is in the Flex framework and that I’ve added some useful functionality. And I’m fairly certain that this bug fix will save some cursing for developers when the next point release of the framework comes out!

I then picked up another bug to look at and also successfully submitted a patch for it. As a prize (along with having hopefully helped to make Flex a better place for developers) I get to display this little badge:

Overall I found the event to be very rewarding. More important than the bugs I fixed on the day is the fact that I now feel that I can contribute to the Flex framework. I’m not using Flex too much at the moment but I know that when I was using it day in, day out I would often come up against bugs. And often the fix was simple to implement. But if the fix required monkey patching or otherwise modifying the framework it wouldn’t be allowed in the project (as the project needs to build with a default Flex framework) and I’d end up using an ugly workaround instead.

Now that I know I can submit patches to Adobe and that those patches can be accepted into the framework (obviously dependant on their quality and any side effects) I am much more likely to do so. And if there are a number of similarily empowered developers using Flex day in, day out then we should see a vast reduction in the number of bugs in the Flex framework. So I think that the inaugural flex bug quash was a great success and I look forward to using a more reliable flex framework in the future.


Second steps with Flash 10 audio programming


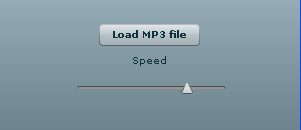
A while back I did some experimenting with the new Flash 10 audio features. Since then I’ve received a couple of emails from people who have noticed that the flash player can freeze up when the mp3 file is initially extracted with the Sound.extract command – especially with longer mp3 files.

The solution is to simply extract only as much of the sound as you need to work with on each sampleData callback. However, this can get confusing when you combine it with the speed changing code from my first example. So I’ve put together another example which uses this method:

The code is available for download here or you can see it below:

package com.kelvinluck.audio
{
   import flash.events.Event;
   import flash.events.SampleDataEvent;
   import flash.media.Sound;
   import flash.media.SoundChannel;
   import flash.net.URLRequest;
   import flash.utils.ByteArray;    

   /**
    * @author Kelvin Luck
    */

   public class MP3Player
   {
     
      public static const BYTES_PER_CALLBACK:int = 4096; // Should be >= 2048 && < = 8192

      private var _playbackSpeed:Number = 1;

      public function set playbackSpeed(value:Number):void
      {
         if (value < 0) {
            throw new Error('Playback speed must be positive!');
         }
         _playbackSpeed = value;
      }

      private var _mp3:Sound;
      private var _dynamicSound:Sound;
      private var _channel:SoundChannel;

      private var _phase:Number;
      private var _numSamples:int;

      public function MP3Player()
      {
      }

      public function loadAndPlay(request:URLRequest):void
      {
         _mp3 = new Sound();
         _mp3.addEventListener(Event.COMPLETE, mp3Complete);
         _mp3.load(request);
      }

      public function playLoadedSound(s:Sound):void
      {
         _mp3 = s;
         play();
      }
     
      public function stop():void
      {
         if (_dynamicSound) {
            _dynamicSound.removeEventListener(SampleDataEvent.SAMPLE_DATA, onSampleData);
            _channel.removeEventListener(Event.SOUND_COMPLETE, onSoundFinished);
            _dynamicSound = null;
            _channel = null;
         }
      }

      private function mp3Complete(event:Event):void
      {
         play();
      }

      private function play():void
      {
         stop();
         _dynamicSound = new Sound();
         _dynamicSound.addEventListener(SampleDataEvent.SAMPLE_DATA, onSampleData);
         
         _numSamples = int(_mp3.length * 44.1);
         
         _phase = 0;
         _channel = _dynamicSound.play();
         _channel.addEventListener(Event.SOUND_COMPLETE, onSoundFinished);
      }
     
      private function onSoundFinished(event:Event):void
      {
         _channel.removeEventListener(Event.SOUND_COMPLETE, onSoundFinished);
         _channel = _dynamicSound.play();
         _channel.addEventListener(Event.SOUND_COMPLETE, onSoundFinished);
      }

      private function onSampleData( event:SampleDataEvent ):void
      {
         var l:Number;
         var r:Number;
         var p:int;
         
         
         var loadedSamples:ByteArray = new ByteArray();
         var startPosition:int = int(_phase);
         _mp3.extract(loadedSamples, BYTES_PER_CALLBACK * _playbackSpeed, startPosition);
         loadedSamples.position = 0;
         
         while (loadedSamples.bytesAvailable > 0) {
           
            p = int(_phase - startPosition) * 8;
           
            if (p < loadedSamples.length - 8 && event.data.length <= BYTES_PER_CALLBACK * 8) {
               
               loadedSamples.position = p;
               
               l = loadedSamples.readFloat();
               r = loadedSamples.readFloat();
           
               event.data.writeFloat(l);
               event.data.writeFloat(r);
               
            } else {
               loadedSamples.position = loadedSamples.length;
            }
           
            _phase += _playbackSpeed;
           
            // loop
            if (_phase >= _numSamples) {
               _phase -= _numSamples;
               break;
            }
         }
      }
   }
}

You can compare it to the code in the original post to see the changes I made.

One thing to note is that there is still a delay when you load an MP3 in my example. This is because I am using the same FileReference.browse > Sound object hack as last time and this needs to loop over the entire loaded mp3 file while turning it into a Sound object. This wouldn’t be an issue in most use-cases where you have loaded the sound through Sound.load.

I also removed the option of playing the sound backwards in this example as that would have added further complexity to the code and hurt my head even more!


Tweetcoding – 140 characters of actionscript 3


Just over a week ago, Grant Skinner started a competition on Twitter called Tweetcoding. It’s very simple:
#tweetcoding: code something cool in <=140 characters of AS3
By happy coincidence this was just after I’d decided to give Twitter another chance and so I heard about the competition and decided to get involved. The first thing I did was to put together a quick tweetcoding minifier using jQuery – it lets you paste in your (slightly) readable AS3 code and it strips unnecessary whitespace and tells you how many characters you’ve used. Definitely much easier than the find and replace gymnastics I was doing in my text editor to start with!

Next I had big plans for creating a website to allow you to compile your own tweetcodes online. But all three of my approaches failed – I couldn’t trigger Java (and therefore mxmlc) from PHP on my shared host, I couldn’t piggyback on the wonderfl API (they use mxmlc behind the scenes too) and screaming donkey couldn’t handle the DisplayList. Luckily, Robert Cadena had the same idea and managed to execute it wonderfully and produce the tweetcoding compiling robot (I’m not sure what it’s really called!). You can visit that page and check out all of the great entries without compiling yourself.

The next step was to find a way to compile my tweetcoding from FDT – my preferred editor. I tried using Flash but it’s little code window annoyed me quickly and I don’t have CS4 yet so I couldn’t access any of the flash player 10 features. So I set up a project in FDT and created the following class:

package
{
   import flash.filters.*;
   import flash.text.TextField;  
   import flash.media.Microphone;  
   import flash.ui.Mouse;  
   import flash.events.*;        
   import flash.display.*;

   dynamic public class Tweetcode extends MovieClip
   {

      public var g:Graphics;
      public var mt:Function;
      public var lt:Function;
      public var ls:Function;
      public var m:Class;
      public var r:Function;
      public var s:Function;
      public var o:Object;
      public var i:Number = 0;

      public function Tweetcode():void
      {
         stage.scaleMode='noScale';
         stage.align='top';
         g = graphics;
         mt = g.moveTo;
         lt = g.lineTo;
         ls = g.lineStyle;
         m = Math;
         r = m.random;
         s = m.sin;
         o = {};

         addEventListener("enterFrame", f);
      }

      public function f(e:Event):void
      {
         // 140 characters here!
      }
   }
}

As you can see, it includes Grant’s gimmie code and space for me to add my code. I’ve added extra imports as I’ve needed them but I’m sure there are more that could be included. And I added some static typing to the variables even though this isn’t necessary – it does means I get a little help from FDT’s code hinting. Then I added ” –strict=false” to the mxmlc command line in my launch target and I was good to go :)

Below are some of my tweetcoding attempts in reverse chronological order (that doesn’t necessarily mean that they get better though!). Make sure you check out all of the other entries as well though – there is some incredible stuff. It is amazing what you can cram into so few characters!

Flickering Flame

A simple flame-like effect. View

g.clear(),o[++i]={x:mouseX,y:mouseY,b:9},filters=[new BlurFilter(4,4)];for each(p in o)a=p.b-=.2,ls(a,3e9,a),mt(p.x,p.y),lt(p.x+a,p.y--+a);

Windmill

Blow into your microphone to make it spin around!. View

if(i&lt;6.5) q=Microphone.getMicrophone(),q.setLoopBack(),ls(2),x=y=99,mt(0,0),lt(90*s(i),90*m.cos(i)),i+=m.PI/18;rotation+=q.activityLevel/9;

Colourful bondage

The coloured lines want to keep your mouse prisoner. View

g.clear(),Mouse.hide(),o[++i]={x:mouseX,y:mouseY,b:7,c:i< &lt;16+i<&lt;32};for each(p in o)a=p.b-=.3,ls(a,p.c,a),mt(p.x,p.y),lt(mouseX,mouseY);

Stripy wallpaper

Just some nice animating blue stripes. View

g.clear();t=stage,o[++i]={x:300+s(i)*300,b:9,c:9*i};for each(p in o)a=p.b-=.3,ls(a,p.c,a),l=p.a,mt(p.x,0),lt(p.x,t.stageHeight);

Mouse bubbles

Little bubble like particles escaping from the mouse. View

g.clear(),o[++i]={x:mouseX,y:mouseY,a:r()*9-5,b:r()*9};for each(p in o)a=p.b--,ls(2),p.a*=.9,p.b*=.9,mt(p.x+=p.a,p.y+=p.b),lt(p.x+1,p.y+1);

Ninja the mouse killing line

Weird title (I guess the tweetcoding had gone to my head) but probably my favourite of my entries. View

g.clear();o[++i]={x:mouseX,y:mouseY,a:o[i-1],b:9};for each(p in o)!p.a||(ls(p.b--),l=p.a,mt(p.x-=(p.x-l.x)/6,p.y-=(p.y-l.y)/6),lt(l.x,l.y));

Heartbeat

Short and simple. View

g.clear();o[++i]={x:i,y:99+s(i)*99,a:o[i-1]||{x:0,y:99}};for each(p in o)ls(1,p.x*0x020101),mt(p.x,p.y-=(p.y-p.a.y)/6),lt(p.x,p.y+2);

Marching ants

They follow the mouse and slowly straighten out over time. View

g.clear();ls(2);o[++i]={x:mouseX,y:mouseY,a:o[i-1]||{x:250,y:250}};for each(p in o)mt(p.x-=(p.x-p.a.x)/6,p.y-=(p.y-p.a.y)/6),lt(p.x+1,p.y);

Silly String

Stringy stuff falls from your mouse. View

g.clear();ls(2);o[++i]={x:mouseX,y:mouseY,a:o[i-1]||{x:9,y:9}};for each(p in o)mt(p.x-=(p.x-p.a.x)/6,p.y-=(p.y-p.a.y)/6),lt(p.a.x,p.a.y);

Random Silly String

Stringy stuff gets spread around the screen. View

g.clear();ls(1);o[++i]={x:500*r(),y:500*r(),a:o[i-1]||{x:9,y:9}};for each(p in o)mt(p.x-=(p.x-p.a.x)/6,p.y-=(p.y-p.a.y)/6),lt(p.a.x,p.a.y);

First try

This one is from before there was any gimmie code so it's 140 characters that run by themselves. Unsurprisingly, they do very little! View

var w=x=y=200,b,g=graphics,m=Math,l=g.lineTo,c=m.cos,s=m.sin,i=361;while(i--){g.lineStyle(1,m.random()*0xfff);l(w*c(i),w*s(i));l(0,0);}

Tweetcoding is great fun and seems to be part of a trend to impose constraints to trigger creativity. I've been a close follower of the 25 lines competition and been blown away by what people have achieved there. I'm also really interested in the 4k flash game competition and would love to find the time to put an entry together. It's incredible the amazing results you can get by abandoning anything like best practises and trying to squeeze something interesting out of a constrained situation. Good clean geek fun :D


New This happened website


This happened is a series of events focusing on the stories behind interaction design. Having ideas is easier than making them happen. We delve into projects that exist today, how their concepts and production process can help inform future work.
This happened is an event originally organised by Chris O’Shea, Joel Gethin Lewis and Andreas Müller in London. I’ve been lucky enough to attend a few times and it is always really interesting and inspiring. The fact that the speakers talk about the process and the failures along the way is much more interesting than someone just showcasing their work. And I find the field of “interaction design” really interesting – a world somewhere between computers and the real world and somewhere between art and science.

So when Chris asked if I’d help out with a flickr viewer for the new website I was more than happy to help. I put together a little swf which is used throughout the site. It connects to the Flickr API (using as yet unfinished and unrealeased as3 version of flashr) and grabs photos matching certain machine tags. Depending on where in the site you are the swf displays relevant photos (e.g. from a particular city or a particular event) as a simple slidehow. The thishappened team can easily choose to display any photos that attendees have uploaded to flickr with relevant permissions. And they keep editorial control over the content via a special “auth” machine tag which they can generate through their CMS. It’s all pretty simple but it’s a nice way to bring user generated content to their site easily.

This happened is branching out and encouraging people to host events across the world so keep an eye out for one near you (or even set one up yourself) and if you get the chance make sure you attend.


Introducing shAIR – easily monetize your Adobe AIR applications


Update: shAIR is now called Sharify so I’ve updated the links below to point to the new website.

I am very pleased to announce the release of my latest project: shAIR. It is a product that is designed to be used by developers of Adobe AIR applications and makes it very easy for those developers to add “shAIRware” functionality to their applications.

shAIR

To quote Dr Woohoo – an early beta tester of shAIR:
shAIR solves the greatest challenge to the AIR platform for serious developers – how to integrate a trial period, registration & authentication – by creating a simple solution that helps protect and commoditize their applications and intellectual property. It’s simply brilliant!
shAIR is a combination of an as3 swc file and the website/ API which this connects to. A developer integrates the swc into their application and uses the administration panel on the shAIR website to create and administer licenses for the application.

The beautiful identity and website design was done by my good friends over at hoppermagic – thanks guys :) You should get in touch with them if you want to commision any similarily exquisite work!

The launch of shAIR is also interesting because it marks a change in the direction of my company (Luck Laboratories Ltd) from a purely consultancy based company to one which also produces it’s own products. It’s going to be an interesting ride but I’m really excited by the possibilities for shAIR and looking around the web I think it is something that lots of people have been looking for.


First steps with flash 10 audio programming


As I was reading my RSS feeds yesterday I came across a blog post by Andre Michelle where he released some sourcecode for using the new Sound APIs in Flash Player 10. I had a little spare time so I decided to finally set up FDT to allow me to author flash 10 swfs (which was easier than I expected) so I could do some playing.

The idea was to re-create my wave sequencer experiment using the APIs but to get started I did something simpler. I wrote a little class which allows you to load an MP3 file and play it back with the ability to change the playback speed dynamically. Here it is:

You can see the sourcecode for the relevant file below. The interesting stuff from an audio point of view is happening in the onSampleData callback. This is triggered by the Flash player whenever it needs a new buffer of audio samples to play. The code in that function is commented and hopefully pretty self explanatory. It is derived from code in my old wave sequencer experiment which was itself derived from some code in the popforge library.

package com.kelvinluck.audio
{
   import flash.events.Event;
   import flash.events.SampleDataEvent;
   import flash.media.Sound;
   import flash.net.URLRequest;
   import flash.utils.ByteArray;

   /**
    * @author Kelvin Luck
    */

   public class MP3Player
   {

      private var _playbackSpeed:Number = 1;

      public function set playbackSpeed(value:Number):void
      {
         _playbackSpeed = value;
      }

      private var _mp3:Sound;
      private var _loadedMP3Samples:ByteArray;
      private var _dynamicSound:Sound;

      private var _phase:Number;
      private var _numSamples:int;

      public function MP3Player()
      {
      }

      public function loadAndPlay(request:URLRequest):void
      {
         _mp3 = new Sound();
         _mp3.addEventListener(Event.COMPLETE, mp3Complete);
         _mp3.load(request);
      }

      public function playLoadedSound(s:Sound):void
      {
         var bytes:ByteArray = new ByteArray();
         s.extract(bytes, int(s.length * 44.1));
         play(bytes);
      }
     
      public function stop():void
      {
         if (_dynamicSound) {
            _dynamicSound.removeEventListener(SampleDataEvent.SAMPLE_DATA, onSampleData);
            _dynamicSound = null;
         }
      }

      private function mp3Complete(event:Event):void
      {
         playLoadedSound(_mp3);
      }

      private function play(bytes:ByteArray):void
      {
         stop();
         _dynamicSound = new Sound();
         _dynamicSound.addEventListener(SampleDataEvent.SAMPLE_DATA, onSampleData);
         
         _loadedMP3Samples = bytes;
         _numSamples = bytes.length / 8;
         
         _phase = 0;
         _dynamicSound.play();
      }

      private function onSampleData( event:SampleDataEvent ):void
      {
         
         var l:Number;
         var r:Number;
         
         var outputLength:int = 0;
         while (outputLength < 2048) {
            // until we have filled up enough output buffer
           
            // move to the correct location in our loaded samples ByteArray
            _loadedMP3Samples.position = int(_phase) * 8; // 4 bytes per float and two channels so the actual position in the ByteArray is a factor of 8 bigger than the phase
           
            // read out the left and right channels at this position
            l = _loadedMP3Samples.readFloat();
            r = _loadedMP3Samples.readFloat();
           
            // write the samples to our output buffer
            event.data.writeFloat(l);
            event.data.writeFloat(r);
           
            outputLength++;
           
            // advance the phase by the speed...
            _phase += _playbackSpeed;
           
            // and deal with looping (including looping back past the beginning when playing in reverse)
            if (_phase < 0) {
               _phase += _numSamples;
            } else if (_phase >= _numSamples) {
               _phase -= _numSamples;
            }
         }
      }
   }
}

As you can see, there are three public methods in the above class. loadAndPlay will load an mp3 file into a sound object and start playing it at the desired playbackSpeed. stop will stop the currently playing mp3. And playLoadedSound will start playing an already loaded sound object at the desired playbackSpeed. This is useful if you have already preloaded your sound objects but it is also useful for another important reason as you can see in the demo.

Thanks to some great work from an old friend of mine, it is possible to dynamically create a Sound object based on an MP3 loaded through the new FileReference.load() functionality in Flash 10. This is why in the demo you can browse for an mp3 file on your local machine which can then be dynamically controlled by Flash immediately without sending it to a server first.

You can download the complete FDT project of my demo here if you want to look through all of the code. I’m excited by the possibilities that are opening up in flash now that Adobe made some noise – I’ve got a long way to go before I can do anything nearly as incredible as the Hobnox audio tool but I’ve got some ideas and I’m looking forward to playing around with them :)

Update: Check out my follow on post where I examine how to extract the audio on demand rather than up front.


Experiment with Papervision 3D particles and effects


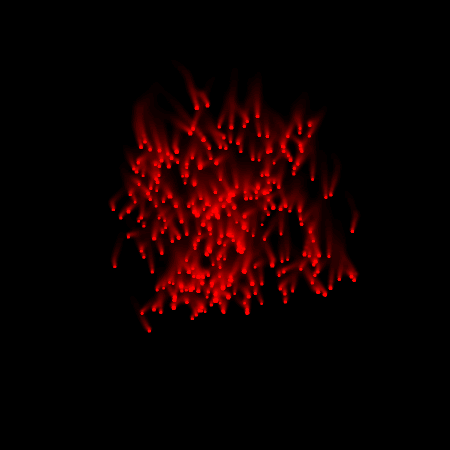
A while back I was prototyping something for a client which involved lots of red dots moving around in 3D space, realised using Papervision 3D. I didn’t end up persuing this route with the client in the end but the effect was pretty cool so I thought I might as well share it here.

The idea is that there is a bunch of particles who are bouncing around randomly stuck within an invisible cube. The effect looked OK by itself but then I decided to try adding effects. I used a BlurFilter and a BitmapColorEffect to give the each of the particles trails. Then I changed the clipping point like in the original borg cube effects demo to give the impression of the particles falling. I like this version the best – if you move your mouse from side to side around the bottom of the demo swf then it starts to look like some kind of flocking is going on (like in my perlin noise experiment).

Click on the image below to see the demo. Click inside the demo swf to give it focus and then you can use the following keys:
  • 1 – Sets the render mode to normal clean particles (the default).
  • 2 – Sets the render mode to particles with trails.
  • 3 – Sets the render mode to falling particles with trails.
  • c – Toggles display of a cube showing the area the particles are contained within.

Particles and effects in Papervision 3D

The sourcecode for this example is pretty simple. You can see it below or you can download it from here.

package  
{
   import org.papervision3d.core.effects.BitmapColorEffect;
   import org.papervision3d.core.effects.BitmapLayerEffect;
   import org.papervision3d.core.geom.Particles;
   import org.papervision3d.materials.WireframeMaterial;
   import org.papervision3d.materials.utils.MaterialsList;
   import org.papervision3d.objects.DisplayObject3D;
   import org.papervision3d.objects.primitives.Cube;
   import org.papervision3d.view.AbstractView;
   import org.papervision3d.view.BasicView;
   import org.papervision3d.view.layer.BitmapEffectLayer;
   
   import flash.display.StageQuality;
   import flash.events.Event;
   import flash.events.KeyboardEvent;
   import flash.filters.BlurFilter;
   import flash.geom.Point;      

   /**
    * @author Kelvin Luck
    */

   [SWF(width='450', height='450', backgroundColor='#000000', frameRate='41')]

   public class ParticlesCube extends BasicView
   {
     
      public static const NUM_PARTICLES:int = 300;
      public static const CONTAINING_CUBE_SIZE:int = 500;
     
      public static const RENDER_MODE_CLEAN:int = 0;
      public static const RENDER_MODE_TRAILS:int = 1;
      public static const RENDER_MODE_FALLING:int = 2;
     
      private var particlesContainer:DisplayObject3D;
      private var particlesHolder:Particles;
      private var particles:Array;
      private var boundsCube:Cube;

      private var bfx:BitmapEffectLayer;
     
      private var _renderMode:int;
      public function set renderMode(value:int):void
      {
         if (value == _renderMode) return;
         
         clearBitmapEffects();
         
         var clippingPoint:Point = new Point();
         
         switch (value) {
            case RENDER_MODE_CLEAN:
               // nothing - effects already cleared above...
               break;
            case RENDER_MODE_FALLING:
               clippingPoint.y = -2;
               // fall through...
            case RENDER_MODE_TRAILS:
               bfx = new BitmapEffectLayer(viewport, stage.stageWidth, stage.stageHeight, true, 0xffffff);
               
               bfx.addEffect(new BitmapLayerEffect(new BlurFilter(2, 2, 2)));
               bfx.addEffect(new BitmapColorEffect(1, 1, 1, .9));
               
               bfx.clippingPoint = clippingPoint;
               
               bfx.addDisplayObject3D(particlesHolder);
               
               viewport.containerSprite.addLayer(bfx);
               break;
            default:
               throw new Error(value + ' is an invalid render mode');
         }
         _renderMode = value;
      }
     
      private var _displayCube:Boolean = true;
      public function set displayCube(value:Boolean):void
      {
         if (value != _displayCube) {
            _displayCube = value;
            boundsCube.visible = value;
         }
      }

      public function ParticlesCube()
      {
         super(550, 550);
         
         stage.quality = StageQuality.MEDIUM;
         
         particlesContainer = new DisplayObject3D();
         scene.addChild(particlesContainer);
         
         var cubeMaterial:WireframeMaterial = new WireframeMaterial(0x0000ff, 1, 2);
         var materialsList:MaterialsList = new MaterialsList();
         materialsList.addMaterial(cubeMaterial, 'all');
         
         boundsCube = new Cube(materialsList, CONTAINING_CUBE_SIZE, CONTAINING_CUBE_SIZE, CONTAINING_CUBE_SIZE);
         particlesContainer.addChild(boundsCube);
         displayCube = false;
         
         particlesHolder = new Particles();
         particlesContainer.addChild(particlesHolder);
         
         init(NUM_PARTICLES, CONTAINING_CUBE_SIZE);
         
         stage.addEventListener(KeyboardEvent.KEY_DOWN, onKeyDown);
         
         startRendering();
      }

      public function init(numParticles:int, containingCubeSize:int):void
      {
         var movingParticle:MovingParticle;
         
         if (particles) {
            particlesHolder.removeAllParticles();
         }
         
         particles = [];
         
         var i:int = numParticles;
         while (i--) {
            movingParticle = new MovingParticle(containingCubeSize);
            particlesHolder.addParticle(movingParticle);
            particles.push(movingParticle);
         }
         
      }

      override protected function onRenderTick(event:Event = null):void
      {
         // move each particle
         var movingParticle:MovingParticle;
         for each (movingParticle in particles) {
            movingParticle.position();
         }
         
         // twist the container based on mouse position
         particlesContainer.rotationY+=((stage.stageWidth/2)-mouseX)/200;
         particlesContainer.rotationX+=((stage.stageHeight/2)-mouseY)/200;
         
         // render
         super.onRenderTick(event);
      }
     
      private function clearBitmapEffects():void
      {
         if (bfx) {
            viewport.containerSprite.removeLayer(bfx);
            bfx = null;
         }
      }
     
      private function onKeyDown(event:KeyboardEvent):void
      {
         switch (String.fromCharCode(event.keyCode)) {
            case '1':
               renderMode = RENDER_MODE_CLEAN;
               break;
            case '2':
               renderMode = RENDER_MODE_TRAILS;
               break;
            case '3':
               renderMode = RENDER_MODE_FALLING;
               break;
            case 'c':
            case 'C':
               displayCube = !_displayCube;
               break;
         }
      }
   }
}

import org.papervision3d.core.geom.renderables.Particle;
import org.papervision3d.materials.special.ParticleMaterial;

internal class MovingParticle extends Particle
{
   
   public static const PARTICLE_SIZE:int = 10;
   public static const MAX_SPEED:int = 5;
   
   private var dX:Number;
   private var dY:Number;
   private var dZ:Number;
   private var halfSize:Number;

   public function MovingParticle(containingCubeSize:int)
   {
      var mat:ParticleMaterial = new ParticleMaterial(0xff0000, 1, ParticleMaterial.SHAPE_CIRCLE);
      super(mat, PARTICLE_SIZE);
     
      var size:int = containingCubeSize;
      halfSize = size / 2;
     
      x = (Math.random() * size) - halfSize;
      y = (Math.random() * size) - halfSize;
      z = (Math.random() * size) - halfSize;
     
      dX = Math.random() * MAX_SPEED;
      dY = Math.random() * MAX_SPEED;
      dZ = Math.random() * MAX_SPEED;
     
   }
   
   public function position():void
   {
      x += dX;
      if (x > halfSize || x < -halfSize) dX *= -1;
      y += dY;
      if (y > halfSize || y < -halfSize) dY *= -1;
      z += dZ;
      if (z > halfSize || z < -halfSize) dZ *= -1;
   }
}
// This line is just to stop the code formatter on my blog getting confused! >


New multiplayer papervision game


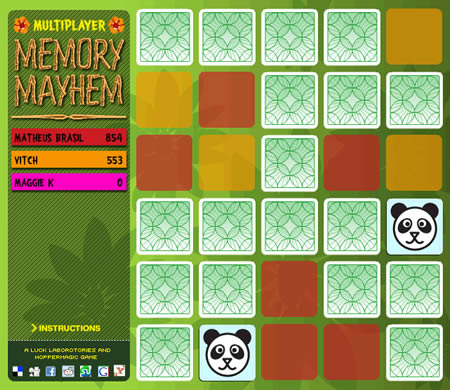
I’ve just released my entry into the Nonoba Multiplayer API Kick Off competition. It’s a multiplayer take on the old memory cards game where you have to turn over pairs of cards and try to remember what was under each one. The multiplayer aspect makes it much more frantic and fun as other players are looking at the same cards at the same time as you and you don’t want them to steal your pairs!

It will probably make more sense if you try it out yourself so go ahead and click the image below to play multiplayer memory mayhem!
My good friend Leigh Kayley did the designs (including illustrating all of the cool animals) and I built the game using Papervision, PureMVC, GTween and the Nonoba multiplayer API.

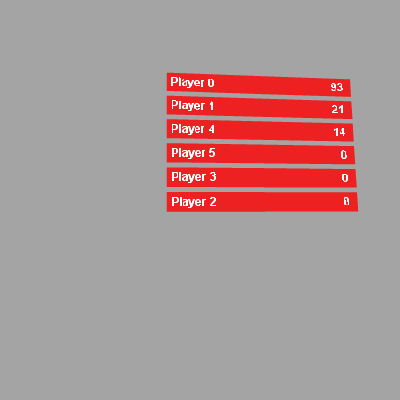
While I was building the game I did a little prototype for the score board transitions using papervision which you can see by clicking the image below. Click anywhere in the movie to give a random player some random points (and so maybe rearrange the scores) and press any keyboard key to toggle some mouse following behaviour.

Papervision 3D score panels test

Unfortunately in the game you can’t really see the 3d transitions on the scores so I thought I’d upload this for people to look at. And I’ve also uploaded the source code for anyone who is interested. It’s probably not the best because it was a prototype stuck together quickly but it may be useful to someone…

Update:

I’m pleased to say that Multiplayer Memory Mayhem won third prize in the multiplayer kickoff competion on Nonoba… Yay!