kelvinluck.com

a stroke of luck

Custom 404 error messages with CodeIgniter


CodeIgniter is an “open source PHP web application framework that helps you write kick ass PHP programs”. It’s a nice MVC framework which makes writing PHP bearable by enforcing some organisation and structure on your project. I’ve used it a few times, most recently when I built the Sharify website.

CodeIgniter provides helpful templates for certain error states of your application including a 404 Page not found. And you can edit these templates to suit your needs. Unfortunately these templates are static view code and in an error situation you can’t easily query a database or access most of the functionality of CodeIgniter. This is quite limiting – in my case I couldn’t render my error view into the standard template view I use on the rest of the site. And so I came up with a bit of a hack to make a 404 error behave like any other page request.

I started by creating a method on my default controller (home) called “page_not_found”. Inside this method I generate my error page (by inserting the relevant view into my main template view as I do throughout the rest of the site). Since this is a normal controller method I can interact with any models and views I desire (for example if I needed to grab stuff from the database to build my navigation I could) to produce my output page.

Then I need to override the CI_Exceptions class. So I create the file MY_Exceptions.php inside CI_DIR/application/libraries (where CI_DIR is the path to your codeigniter system folder). Inside that file I override the show_404 method and instead of simply outputting a view I use cURL to request the page I previously set up. I also POST the originally requested URI along with this request which allows me to output it on the generated page if desired.

The code looks like this:

class MY_Exceptions extends CI_Exceptions {
   
   function show_404($page = '')
   {
      $code = '404';
      $text = 'Page not found';
     
      $server_protocol = (isset($_SERVER['SERVER_PROTOCOL'])) ? $_SERVER['SERVER_PROTOCOL'] : FALSE;
   
      if (substr(php_sapi_name(), 0, 3) == 'cgi')
      {
         header("Status: {$code} {$text}", TRUE);
      }
      elseif ($server_protocol == 'HTTP/1.1' OR $server_protocol == 'HTTP/1.0')
      {
         header($server_protocol." {$code} {$text}", TRUE, $code);
      }
      else
      {
         header("HTTP/1.1 {$code} {$text}", TRUE, $code);
      }
      $ch = curl_init();
      curl_setopt($ch, CURLOPT_URL, 'http://' . $_SERVER['HTTP_HOST'] .'/home/page_not_found/');
      curl_setopt($ch, CURLOPT_HEADER, 0);
      curl_setopt($ch, CURLOPT_POST, 1);
      curl_setopt($ch, CURLOPT_POSTFIELDS, 'originalURL=' . urlencode($_SERVER['REQUEST_URI']));
      curl_ex ec($ch); // WordPress won't let me post the word e x e c - remove the space in the previous code to make it run...
      curl_close($ch);
   }
}

As you can see, I make sure that the correct HTTP header is outputted and then I pass through the page loaded from my “page_not_found” method on my default “home” controller. This means if you visit a non existent page on the Sharify site (like this one) then you get a pretty page which looks like the rest of the site and tries to help you find what you are looking for.

In a perfect world there would be a cleaner way to do this within the CodeIgniter framework but I did some searching when I started building the site and I couldn’t find any clean solutions. There were a couple of other suggestions on the forums but they seemed to involve editing more files which shouldn’t be related to error handling. While I don’t like the hacky nature of the extra curl request I think this solution is relatively simple and clean.




ColorTransform explorer


I recently worked on a project where the client was providing designs for image manipulations which were being done with a ColorTransform in flash. After a couple of bits of feedback along the lines of “…can the blues have more yellows in them at times…” I decided there must be a better way.

So I built the client a tool which allowed them to fiddle with parameters to ColorTransform and send me the numbers. It’s in the same vein as the Flex style explorer but much simpler. So simple in fact that it is hardly worth posting but I was surprised that I couldn’t find something similar on google so I thought I would save someone else the half hour it took to put together…

Click on the picture below to try it out or you can download the source here.


Flex bug quashing


Last weekend I joined in on the first ever Flex Bug Quash. What is a bug quash?

An event where the community comes together with one goal in mind… To quash as many bugs in one day as humanly possible. Don’t just complain, do something about it.

The idea was to allow the commuity to get involved and contribute bug fixes for the Flex framework back to Adobe. This is open source in action! As someone who has spent a fair amount of time cursing the Flex framework and it’s bugs I thought that I should get involved. It also seemed like a good opportunity to network with other Flex developers – although this aspect would have definitely been better if I was close enough to attend in person in Seattle (or one of the other hubs). At least I was in the correct timezone – some developers in Europe, Asia and Australia worked through the night!

After checking out a working copy of the entire 3.x branch of the Flex SDK from the repository I could work on getting my environment set up. The SDK has Flex Builder library projects for the framework.swc, airframework.swc and rpc.swc set up. So I set up a “BugQuash” project and linked it into the framework library project. This means I was basically monkey patching the framework.swc with the latest sourcecode from svn – including any changes I made. This allowed me to easily tackle bugs.

There was a list of bugs on the Adobe bug tracker which were marked as “SDK Community Bug Fix Candidates” – these were bugs which were considered good candidates for the community to tackle. I think this meant that they hadn’t been judged important enough to be placed on an Adobe engineer’s workload and they weren’t considered too hard or dangerous for the community to have a go at. I had a quick flick through the issues on this list and picked the first one which looked like a nice quick and simple fix.

My first bug took a little longer than I expected to fix. While it was quite simple I wanted to make sure that I was doing things correctly and putting my code in the correct places. It’s harder than simply writing code as you have to make sure you think about how any other developer might use (or abuse) the code you write. Once my code was done I generated a patch file – this was easily done with Tortoise SVN. Having signed the relevant legal documents I could then simply attach the patch to the relevant ticket in the bug tracking system.

Once the patch was on the system it needed to be reviewed by a member of the community. Chris Hill kindly volunterred and checked my code and added some extra test cases. Once this was done the bug went into a queue waiting for official Adobe code review. And once that was done my patch was given the go-ahead and committed back to the framework repository. It was very satisfying when my bug was approved and my patch was checked into SVN. I’m genuinely proud that some of my code is in the Flex framework and that I’ve added some useful functionality. And I’m fairly certain that this bug fix will save some cursing for developers when the next point release of the framework comes out!

I then picked up another bug to look at and also successfully submitted a patch for it. As a prize (along with having hopefully helped to make Flex a better place for developers) I get to display this little badge:

Overall I found the event to be very rewarding. More important than the bugs I fixed on the day is the fact that I now feel that I can contribute to the Flex framework. I’m not using Flex too much at the moment but I know that when I was using it day in, day out I would often come up against bugs. And often the fix was simple to implement. But if the fix required monkey patching or otherwise modifying the framework it wouldn’t be allowed in the project (as the project needs to build with a default Flex framework) and I’d end up using an ugly workaround instead.

Now that I know I can submit patches to Adobe and that those patches can be accepted into the framework (obviously dependant on their quality and any side effects) I am much more likely to do so. And if there are a number of similarily empowered developers using Flex day in, day out then we should see a vast reduction in the number of bugs in the Flex framework. So I think that the inaugural flex bug quash was a great success and I look forward to using a more reliable flex framework in the future.


shAIR is now Sharify


Not too long ago I posted about the launch of shAIR – a service which allows developers to easily add shareware functionality to their Adobe AIR applications.

Shortly after the launch we were approached by representatives of Adobe informing us that our choice of name infringed on their trademark. To cut a long story short, while we weren’t convinced that Adobe’s claim was fair, we decided to change the name of the service.

So I take great pleasure in introducing you to Sharify. Check out the website to find out just how easy it is to convert your AIR application into a shareware application. You just need to set up the relevant information on sharify.it and integrate a small swc file. Then you can sell your application to your users and Shairfy will ensure that only people who have purchased a license can use it (after an optional trial period).

The service is still in private beta but if you sign up on the site and include a good description of the application you’ve built or are building then we will be happy to invite you to try it out. What are you waiting for? It’s time to Sharify it!

http://www.sharify.it/


Second steps with Flash 10 audio programming


A while back I did some experimenting with the new Flash 10 audio features. Since then I’ve received a couple of emails from people who have noticed that the flash player can freeze up when the mp3 file is initially extracted with the Sound.extract command – especially with longer mp3 files.

The solution is to simply extract only as much of the sound as you need to work with on each sampleData callback. However, this can get confusing when you combine it with the speed changing code from my first example. So I’ve put together another example which uses this method:

The code is available for download here or you can see it below:

package com.kelvinluck.audio
{
   import flash.events.Event;
   import flash.events.SampleDataEvent;
   import flash.media.Sound;
   import flash.media.SoundChannel;
   import flash.net.URLRequest;
   import flash.utils.ByteArray;    

   /**
    * @author Kelvin Luck
    */

   public class MP3Player
   {
     
      public static const BYTES_PER_CALLBACK:int = 4096; // Should be >= 2048 && < = 8192

      private var _playbackSpeed:Number = 1;

      public function set playbackSpeed(value:Number):void
      {
         if (value < 0) {
            throw new Error('Playback speed must be positive!');
         }
         _playbackSpeed = value;
      }

      private var _mp3:Sound;
      private var _dynamicSound:Sound;
      private var _channel:SoundChannel;

      private var _phase:Number;
      private var _numSamples:int;

      public function MP3Player()
      {
      }

      public function loadAndPlay(request:URLRequest):void
      {
         _mp3 = new Sound();
         _mp3.addEventListener(Event.COMPLETE, mp3Complete);
         _mp3.load(request);
      }

      public function playLoadedSound(s:Sound):void
      {
         _mp3 = s;
         play();
      }
     
      public function stop():void
      {
         if (_dynamicSound) {
            _dynamicSound.removeEventListener(SampleDataEvent.SAMPLE_DATA, onSampleData);
            _channel.removeEventListener(Event.SOUND_COMPLETE, onSoundFinished);
            _dynamicSound = null;
            _channel = null;
         }
      }

      private function mp3Complete(event:Event):void
      {
         play();
      }

      private function play():void
      {
         stop();
         _dynamicSound = new Sound();
         _dynamicSound.addEventListener(SampleDataEvent.SAMPLE_DATA, onSampleData);
         
         _numSamples = int(_mp3.length * 44.1);
         
         _phase = 0;
         _channel = _dynamicSound.play();
         _channel.addEventListener(Event.SOUND_COMPLETE, onSoundFinished);
      }
     
      private function onSoundFinished(event:Event):void
      {
         _channel.removeEventListener(Event.SOUND_COMPLETE, onSoundFinished);
         _channel = _dynamicSound.play();
         _channel.addEventListener(Event.SOUND_COMPLETE, onSoundFinished);
      }

      private function onSampleData( event:SampleDataEvent ):void
      {
         var l:Number;
         var r:Number;
         var p:int;
         
         
         var loadedSamples:ByteArray = new ByteArray();
         var startPosition:int = int(_phase);
         _mp3.extract(loadedSamples, BYTES_PER_CALLBACK * _playbackSpeed, startPosition);
         loadedSamples.position = 0;
         
         while (loadedSamples.bytesAvailable > 0) {
           
            p = int(_phase - startPosition) * 8;
           
            if (p < loadedSamples.length - 8 && event.data.length <= BYTES_PER_CALLBACK * 8) {
               
               loadedSamples.position = p;
               
               l = loadedSamples.readFloat();
               r = loadedSamples.readFloat();
           
               event.data.writeFloat(l);
               event.data.writeFloat(r);
               
            } else {
               loadedSamples.position = loadedSamples.length;
            }
           
            _phase += _playbackSpeed;
           
            // loop
            if (_phase >= _numSamples) {
               _phase -= _numSamples;
               break;
            }
         }
      }
   }
}

You can compare it to the code in the original post to see the changes I made.

One thing to note is that there is still a delay when you load an MP3 in my example. This is because I am using the same FileReference.browse > Sound object hack as last time and this needs to loop over the entire loaded mp3 file while turning it into a Sound object. This wouldn’t be an issue in most use-cases where you have loaded the sound through Sound.load.

I also removed the option of playing the sound backwards in this example as that would have added further complexity to the code and hurt my head even more!


Introducing shAIR – easily monetize your Adobe AIR applications


Update: shAIR is now called Sharify so I’ve updated the links below to point to the new website.

I am very pleased to announce the release of my latest project: shAIR. It is a product that is designed to be used by developers of Adobe AIR applications and makes it very easy for those developers to add “shAIRware” functionality to their applications.

shAIR

To quote Dr Woohoo – an early beta tester of shAIR:
shAIR solves the greatest challenge to the AIR platform for serious developers – how to integrate a trial period, registration & authentication – by creating a simple solution that helps protect and commoditize their applications and intellectual property. It’s simply brilliant!
shAIR is a combination of an as3 swc file and the website/ API which this connects to. A developer integrates the swc into their application and uses the administration panel on the shAIR website to create and administer licenses for the application.

The beautiful identity and website design was done by my good friends over at hoppermagic – thanks guys :) You should get in touch with them if you want to commision any similarily exquisite work!

The launch of shAIR is also interesting because it marks a change in the direction of my company (Luck Laboratories Ltd) from a purely consultancy based company to one which also produces it’s own products. It’s going to be an interesting ride but I’m really excited by the possibilities for shAIR and looking around the web I think it is something that lots of people have been looking for.


First steps with flash 10 audio programming


As I was reading my RSS feeds yesterday I came across a blog post by Andre Michelle where he released some sourcecode for using the new Sound APIs in Flash Player 10. I had a little spare time so I decided to finally set up FDT to allow me to author flash 10 swfs (which was easier than I expected) so I could do some playing.

The idea was to re-create my wave sequencer experiment using the APIs but to get started I did something simpler. I wrote a little class which allows you to load an MP3 file and play it back with the ability to change the playback speed dynamically. Here it is:

You can see the sourcecode for the relevant file below. The interesting stuff from an audio point of view is happening in the onSampleData callback. This is triggered by the Flash player whenever it needs a new buffer of audio samples to play. The code in that function is commented and hopefully pretty self explanatory. It is derived from code in my old wave sequencer experiment which was itself derived from some code in the popforge library.

package com.kelvinluck.audio
{
   import flash.events.Event;
   import flash.events.SampleDataEvent;
   import flash.media.Sound;
   import flash.net.URLRequest;
   import flash.utils.ByteArray;

   /**
    * @author Kelvin Luck
    */

   public class MP3Player
   {

      private var _playbackSpeed:Number = 1;

      public function set playbackSpeed(value:Number):void
      {
         _playbackSpeed = value;
      }

      private var _mp3:Sound;
      private var _loadedMP3Samples:ByteArray;
      private var _dynamicSound:Sound;

      private var _phase:Number;
      private var _numSamples:int;

      public function MP3Player()
      {
      }

      public function loadAndPlay(request:URLRequest):void
      {
         _mp3 = new Sound();
         _mp3.addEventListener(Event.COMPLETE, mp3Complete);
         _mp3.load(request);
      }

      public function playLoadedSound(s:Sound):void
      {
         var bytes:ByteArray = new ByteArray();
         s.extract(bytes, int(s.length * 44.1));
         play(bytes);
      }
     
      public function stop():void
      {
         if (_dynamicSound) {
            _dynamicSound.removeEventListener(SampleDataEvent.SAMPLE_DATA, onSampleData);
            _dynamicSound = null;
         }
      }

      private function mp3Complete(event:Event):void
      {
         playLoadedSound(_mp3);
      }

      private function play(bytes:ByteArray):void
      {
         stop();
         _dynamicSound = new Sound();
         _dynamicSound.addEventListener(SampleDataEvent.SAMPLE_DATA, onSampleData);
         
         _loadedMP3Samples = bytes;
         _numSamples = bytes.length / 8;
         
         _phase = 0;
         _dynamicSound.play();
      }

      private function onSampleData( event:SampleDataEvent ):void
      {
         
         var l:Number;
         var r:Number;
         
         var outputLength:int = 0;
         while (outputLength < 2048) {
            // until we have filled up enough output buffer
           
            // move to the correct location in our loaded samples ByteArray
            _loadedMP3Samples.position = int(_phase) * 8; // 4 bytes per float and two channels so the actual position in the ByteArray is a factor of 8 bigger than the phase
           
            // read out the left and right channels at this position
            l = _loadedMP3Samples.readFloat();
            r = _loadedMP3Samples.readFloat();
           
            // write the samples to our output buffer
            event.data.writeFloat(l);
            event.data.writeFloat(r);
           
            outputLength++;
           
            // advance the phase by the speed...
            _phase += _playbackSpeed;
           
            // and deal with looping (including looping back past the beginning when playing in reverse)
            if (_phase < 0) {
               _phase += _numSamples;
            } else if (_phase >= _numSamples) {
               _phase -= _numSamples;
            }
         }
      }
   }
}

As you can see, there are three public methods in the above class. loadAndPlay will load an mp3 file into a sound object and start playing it at the desired playbackSpeed. stop will stop the currently playing mp3. And playLoadedSound will start playing an already loaded sound object at the desired playbackSpeed. This is useful if you have already preloaded your sound objects but it is also useful for another important reason as you can see in the demo.

Thanks to some great work from an old friend of mine, it is possible to dynamically create a Sound object based on an MP3 loaded through the new FileReference.load() functionality in Flash 10. This is why in the demo you can browse for an mp3 file on your local machine which can then be dynamically controlled by Flash immediately without sending it to a server first.

You can download the complete FDT project of my demo here if you want to look through all of the code. I’m excited by the possibilities that are opening up in flash now that Adobe made some noise – I’ve got a long way to go before I can do anything nearly as incredible as the Hobnox audio tool but I’ve got some ideas and I’m looking forward to playing around with them :)

Update: Check out my follow on post where I examine how to extract the audio on demand rather than up front.


New multiplayer papervision game


I’ve just released my entry into the Nonoba Multiplayer API Kick Off competition. It’s a multiplayer take on the old memory cards game where you have to turn over pairs of cards and try to remember what was under each one. The multiplayer aspect makes it much more frantic and fun as other players are looking at the same cards at the same time as you and you don’t want them to steal your pairs!

It will probably make more sense if you try it out yourself so go ahead and click the image below to play multiplayer memory mayhem!
My good friend Leigh Kayley did the designs (including illustrating all of the cool animals) and I built the game using Papervision, PureMVC, GTween and the Nonoba multiplayer API.

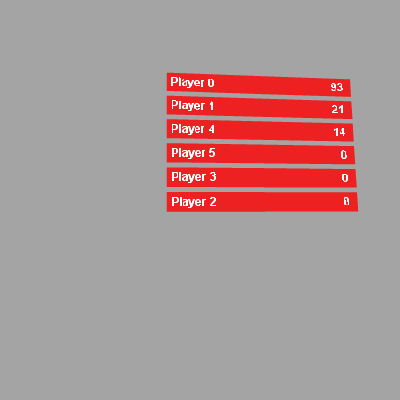
While I was building the game I did a little prototype for the score board transitions using papervision which you can see by clicking the image below. Click anywhere in the movie to give a random player some random points (and so maybe rearrange the scores) and press any keyboard key to toggle some mouse following behaviour.

Papervision 3D score panels test

Unfortunately in the game you can’t really see the 3d transitions on the scores so I thought I’d upload this for people to look at. And I’ve also uploaded the source code for anyone who is interested. It’s probably not the best because it was a prototype stuck together quickly but it may be useful to someone…

Update:

I’m pleased to say that Multiplayer Memory Mayhem won third prize in the multiplayer kickoff competion on Nonoba… Yay!


Slimmer Timer – Flex, Haxe and a web service


I decided it was about time that I learnt how to use Flex. The best way to learn is always by building something so I decided that I’d build a little app to connect to the Slim Timer API and make it easy to keep track of your time. It seemed like something that was perfectly suited to Flex – built from UI components and connecting to an XML webservice.

So here it is: Slimmer Timer. You can download Mac and PC versions as well as seeing a screenshow on the project page at that link.

Although building the app was relatively straightforward, there are some gotchas that I ran into which I thought I would expand on a little here… All of these issues are as I experienced them in the standalone debug player – they may happen differently in the browser plugin.

  • Setting contentType and a custom “Accept” header on a HTTPService only works when the method is POST. If you change the method to GET then these extra headers aren’t sent along with the request.
  • The HTTPService.method documentation is very misleading… GET and POST are the only valid values unless you are using FDS as a proxy. More info on that on this post on FlexCoders

The solution to these problems was to wrap my generated swf in a Screenweaver Hx program. This makes it easy to write a little bit of haXe code which can intercept network calls from the flash and act on them. The haXe wrapper adds the required HTTP headers to my GET calls and also allows Flash to make PUT requests.

To support HTTP PUT requests I appended a “put=true” onto the URL requested by Flash which the haXe wrapper detects and then changes the HTTP request type. haXe’s HTTP class doesn’t support methods other than GET and POST but because it is open source I could easily extend this class to suit my needs. The haXe files I wrote can be seen here if you are interested…

As well allowing me to tweak the network behaviour and therefore make my app work, Screenweaver allowed me to remove the chrome from the app window and make the app slightly transparent. These extras help it to live up to it’s name of “Slimmer Timer” :)

As SlimmerTimer was my first foray into the world of Flex it’s not as well coded as it could be. I’m currently rewriting it using the Cairngorm framework so there may be a better version out some time soon but for now I think it’s quite useful as what it is – a simple little app for keeping track of your time.